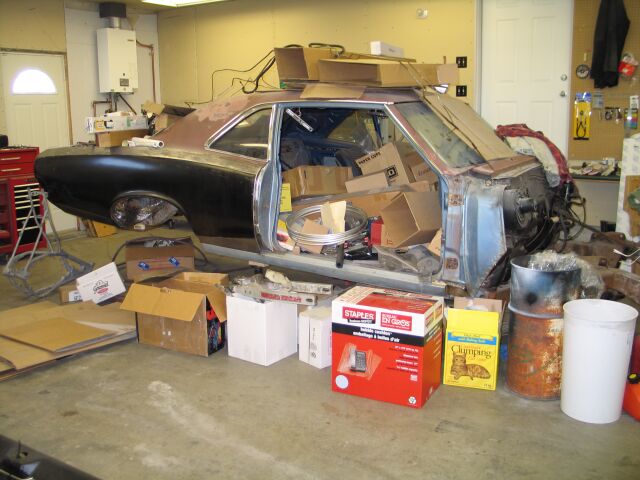
After many years of suggesting (read: begging), I finally convinced my friend Lyle to help me out with the GTO body work, and overall restoration, so a few years ago the car was trailered out to his place for the restoration to resume. Work was sporadic the last couple years, but major accomplishments included installation of full quarter panels, tail panel, rocker panels, complete trunk floor and repair of the inner rear wheel housings. In late 2003, things really started rolling again, so this is where the story continues.
Again, the goal with this car is to appear as Stock as humanly possible,
but with major improvements in performance. This car will be occasionally
drag raced, and possibly autocrossed at some point too. Efforts will be
made to conceal as many performance improvements as possible.
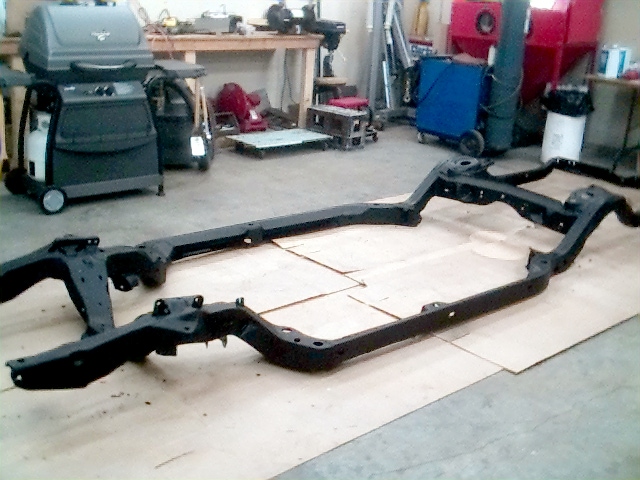
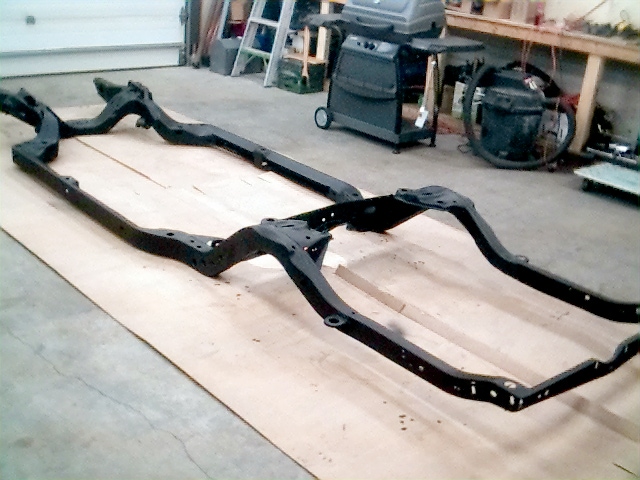
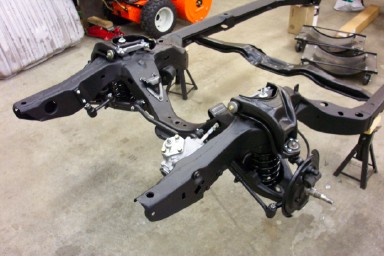
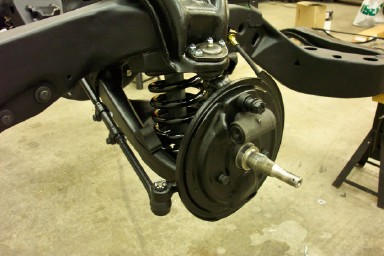
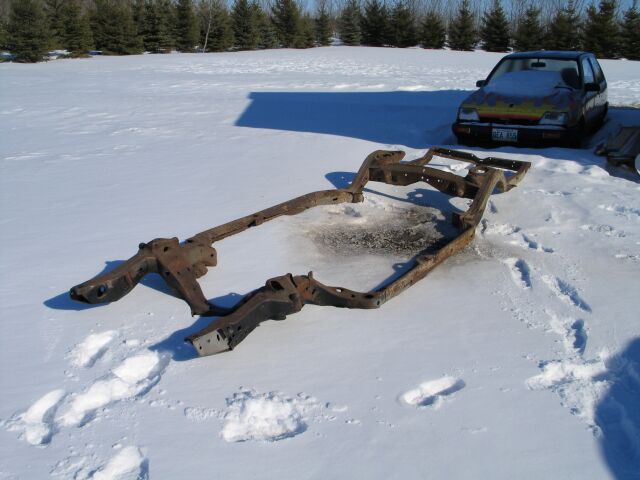
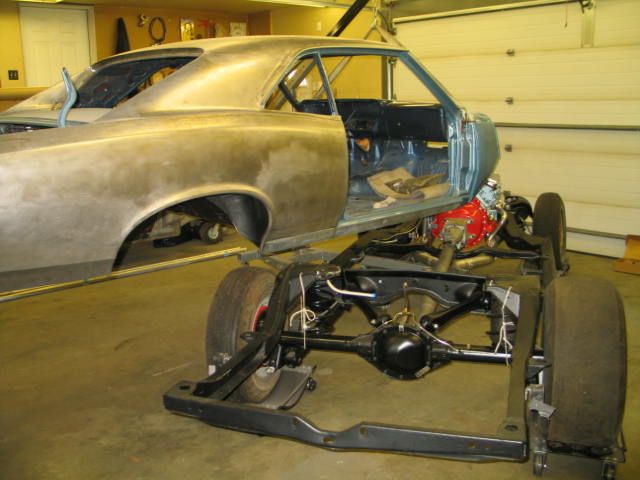
The complete frame was sandblasted, POR-15'd, then top coated with a semi-gloss black chassis paint. Then pictures were taken and beer was consumed.
![]()
![]()


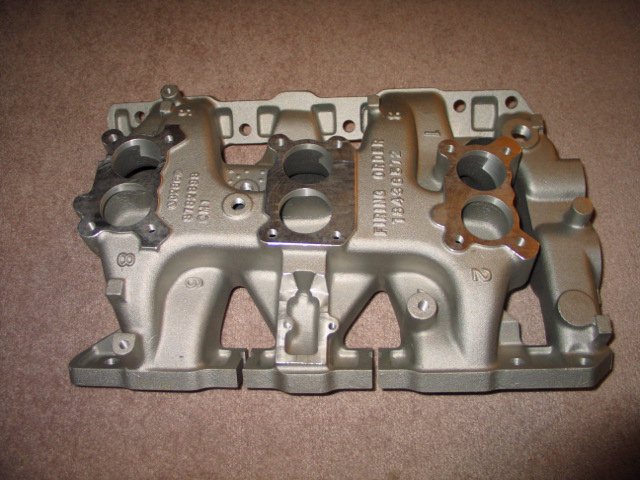
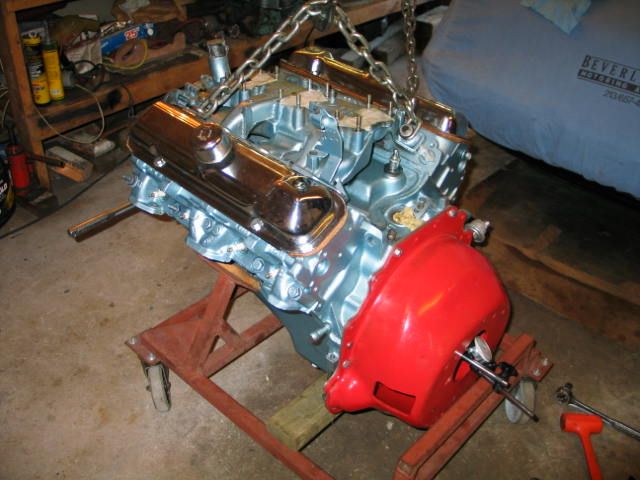
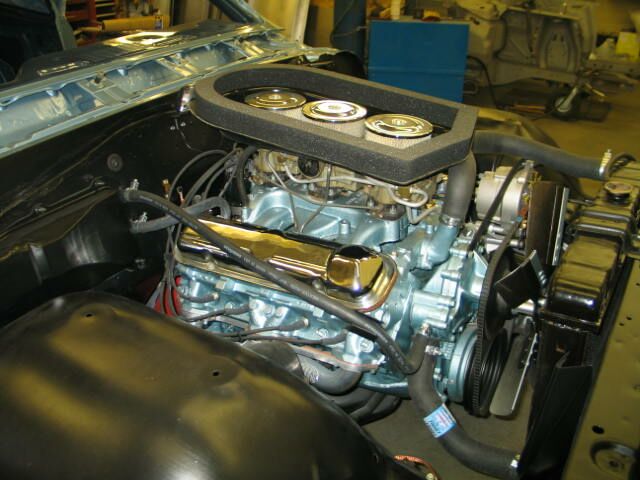
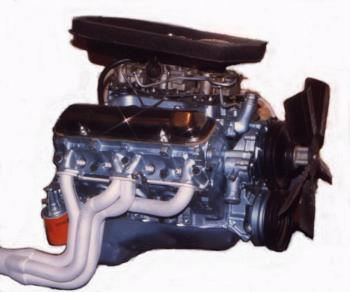
Sharp eyed, hard-core Pontiac'ers may have recognized the tripower setup on my engine (see picture) as a 1965 unit, not the proper '66 unit for my car. Well, my latest acquisition should fix that. Behold, in all it's aluminium (14 lb!!) reproduction glory......my new, correct, '66 tripower intake (before paint).
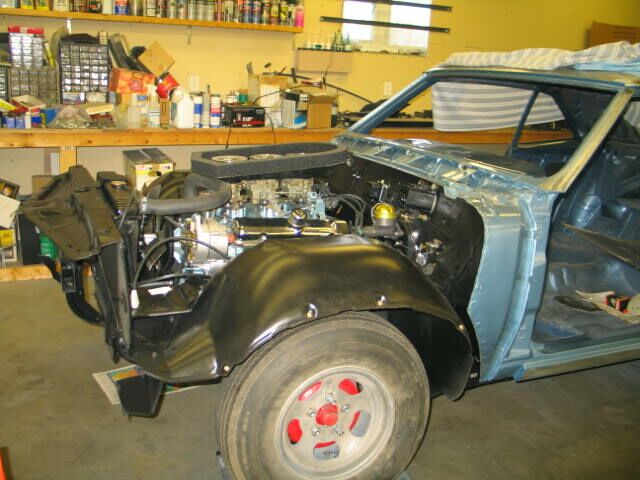
Rotisserie is being built by Lyle.
Body is being stripped of everything else by me (dash, heater, rear windows, etc.), in preparation for the rotisserie.
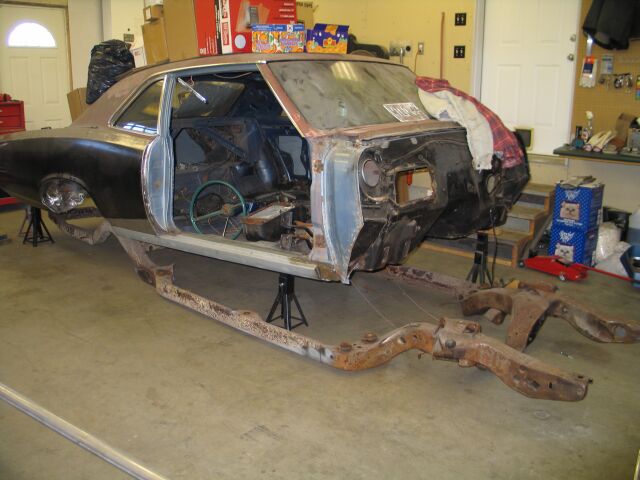
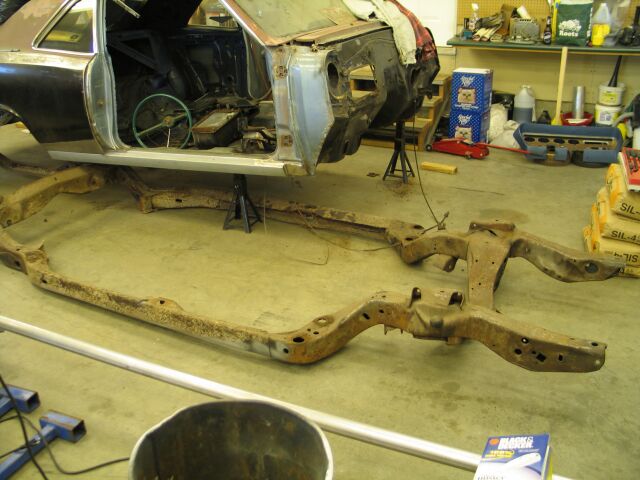
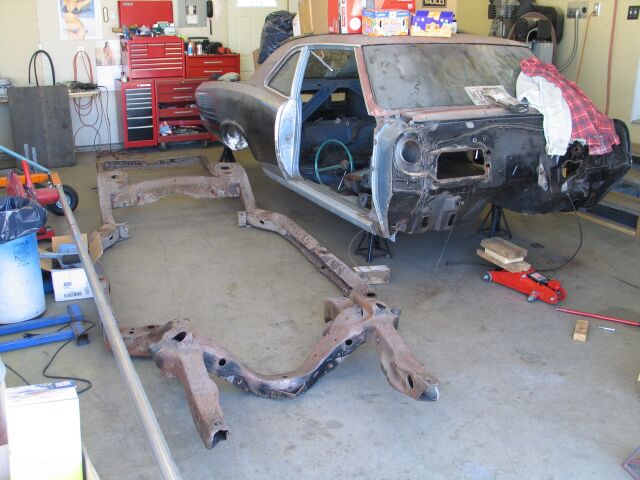
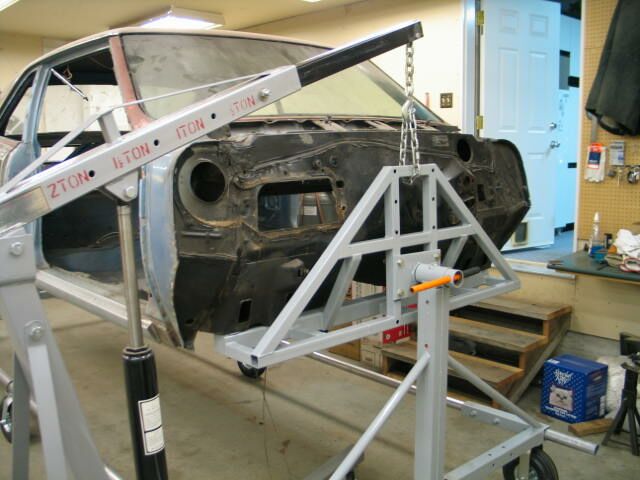
THE BODY IS OFF THE OLD FRAME! After almost 40 years, the marriage
is over....
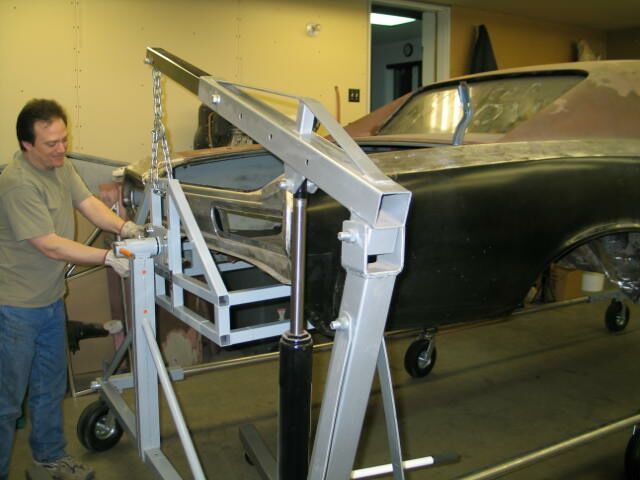
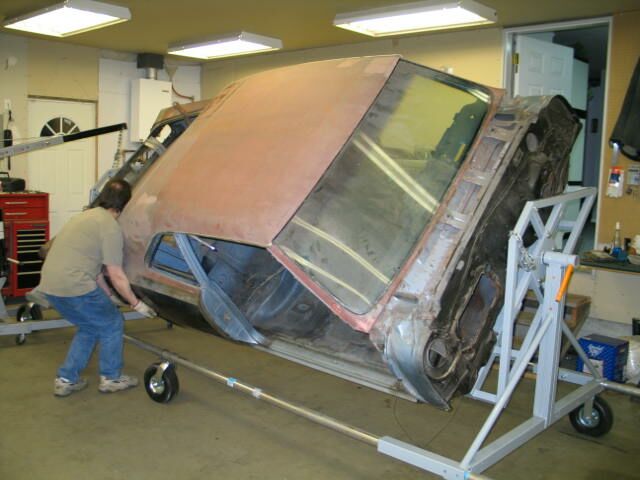
THE BODY IS ON THE ROTISSERIE!

Here's why.....

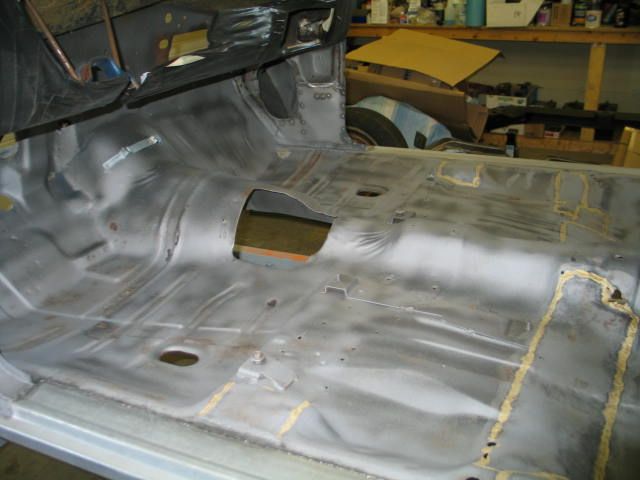
...just an example of some of the underbody work that remains.
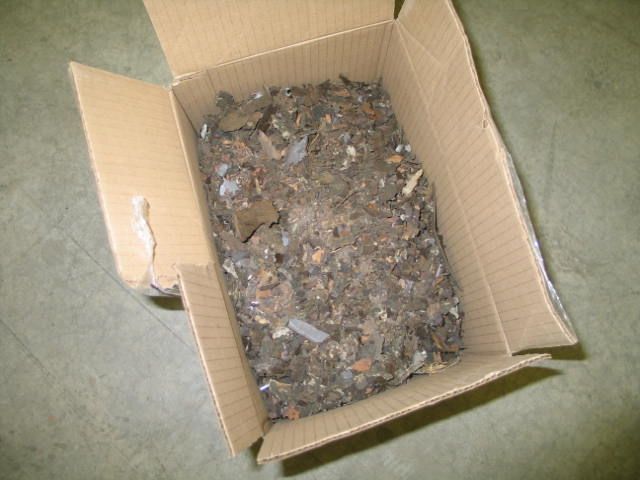
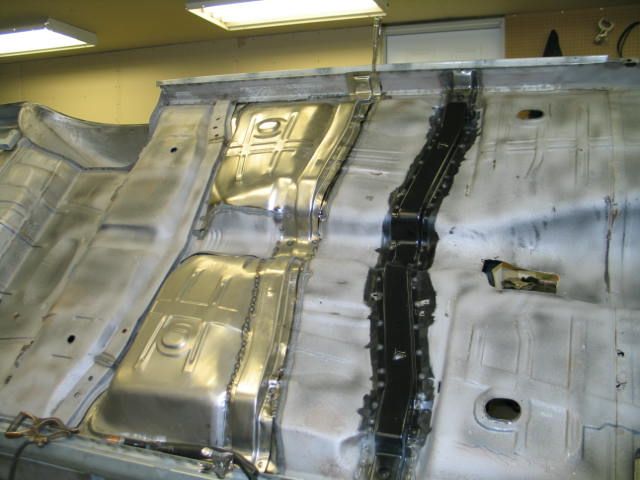
After a hellish 4 hours, and with the aid of a very special impact chisel, Lyle managed to scrape off all the remaining undercoating. This is worth the weight savings alone. Here's the box of scrapin's.
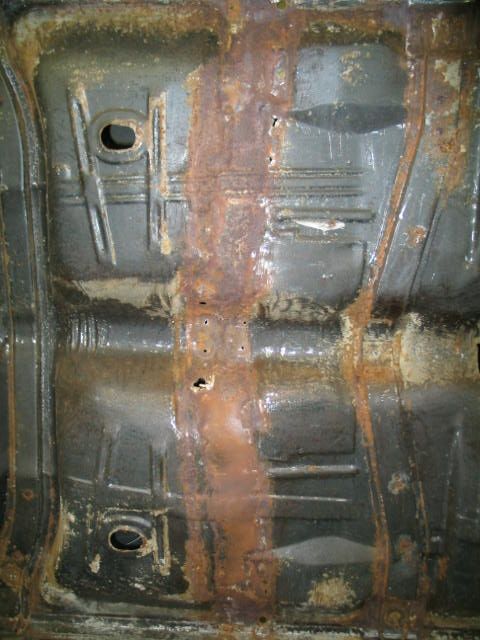
... and here's what the underbody looked like...
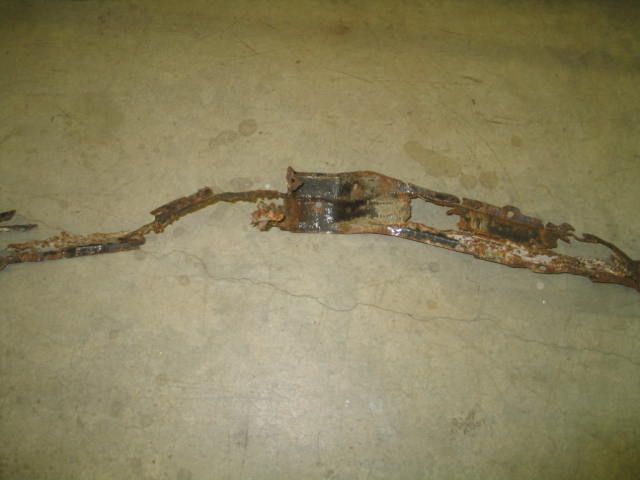
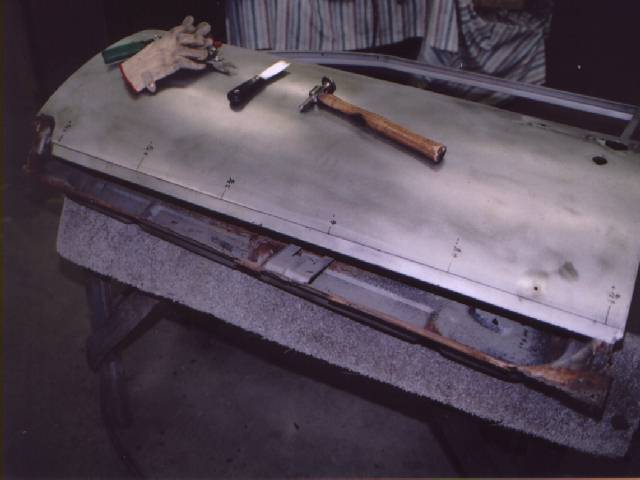
The center floor brace was hacked off, in preparation for replacement with a repro item. Here's what the original center floor brace looked like...
Upon closer inspection of the floor, we found the front floor brace to be in poor shape too, so another repro item was ordered, and the old one hacked off. The rearmost floor brace was in decent shape, with just the ends rotted. Lyle hacked of the rotted ends, and will fabricate replacements.
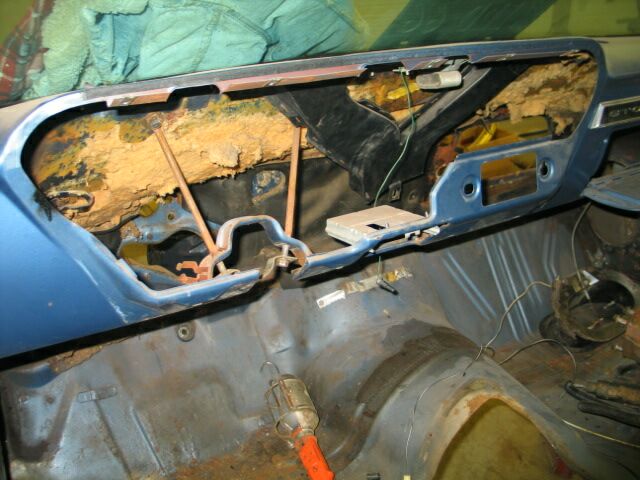
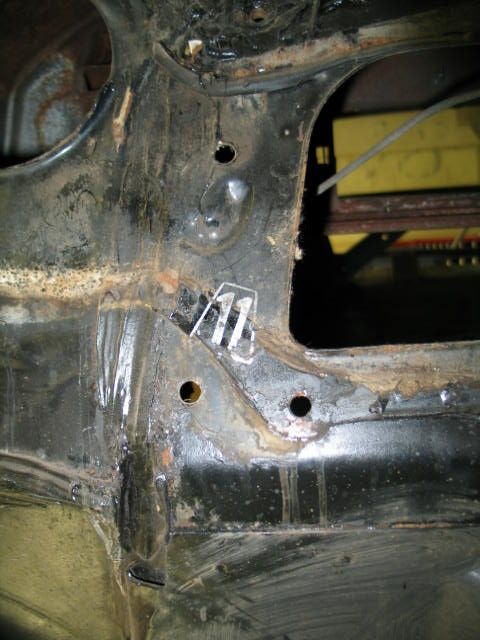
While prepping the car for sandblasting, an interesting factory marking was found on the firewall, inside the heater blower housing. If anyone has any idea what this is/means, please let me know. This marking was carefully measured, and will be recreated after the sandblasting.
So, if you can't move the mountain to Mohammed....maybe it's easier to just load the whole car/rotisserie up on a trailer and take it for some industrial strength sand blasting...
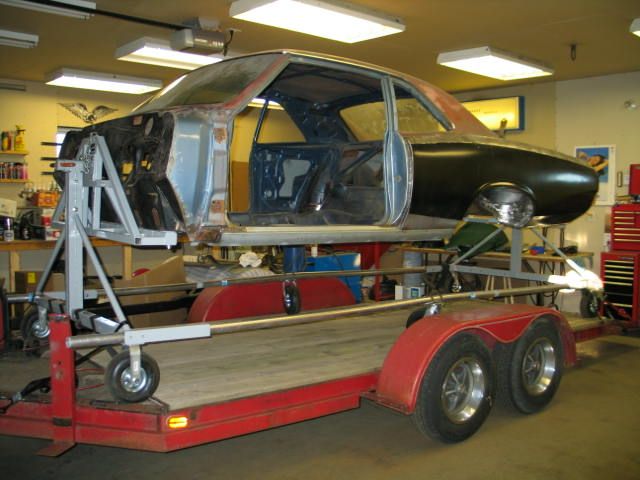
After loading the car up, Lyle removed the remaining glass and other items, and protected the stuff we didn't want blasted. Then we hauled the whole rig to Derrick's Sandblasting, where Kevin helped remove the last traces of rust on the old Goat...
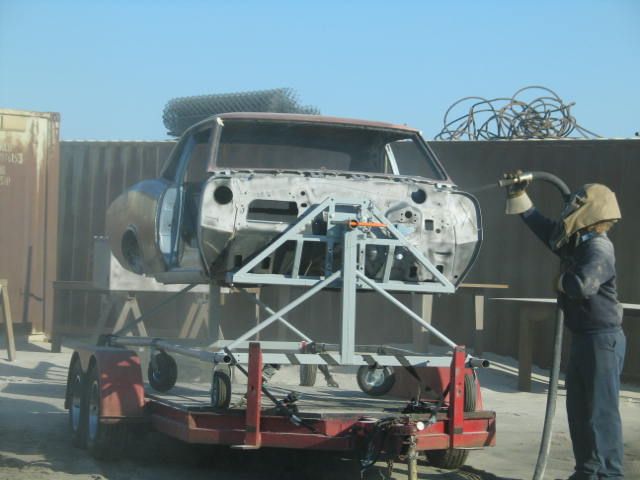
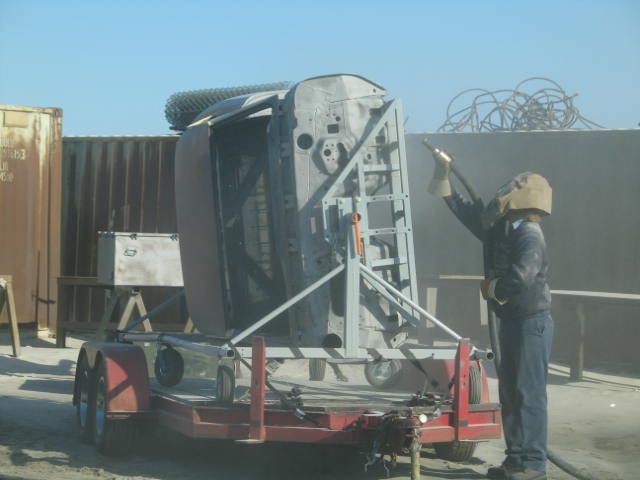
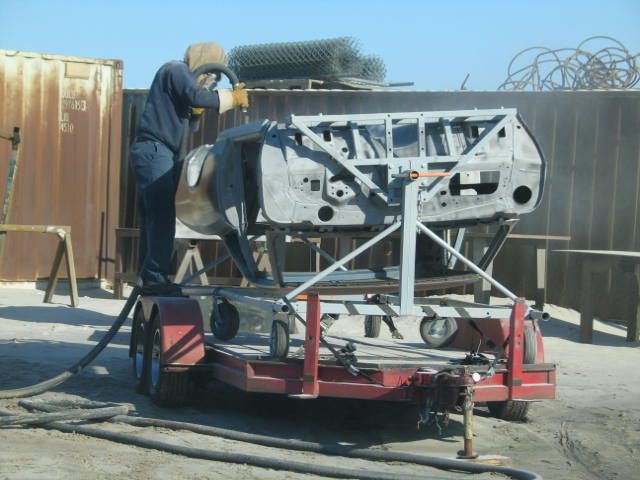
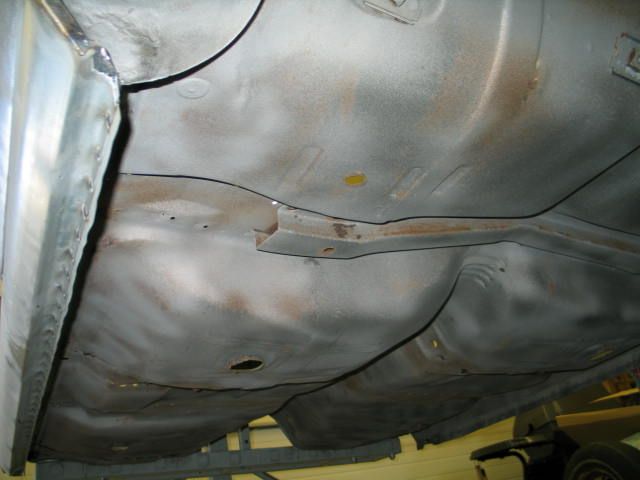
... inside and out. Note the previous repairs to the floorboards.
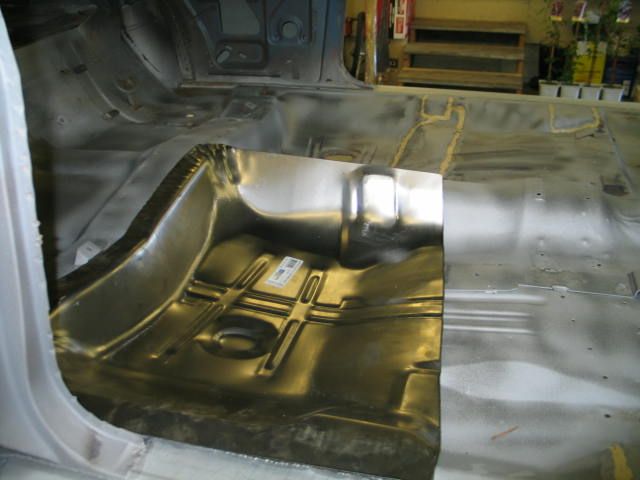
Next up is replacement of the rotted parts of the rear floor...
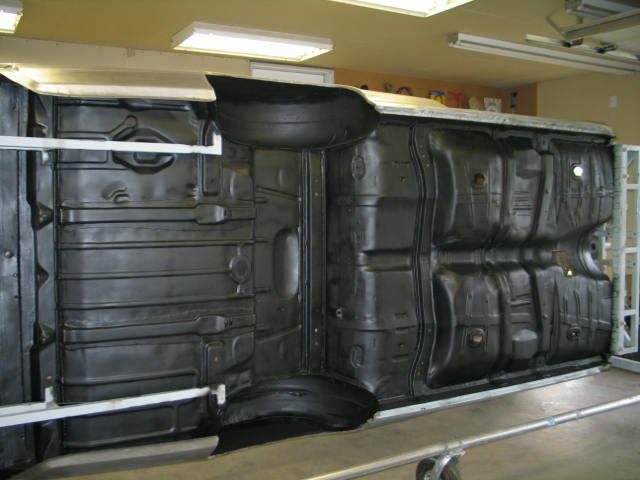
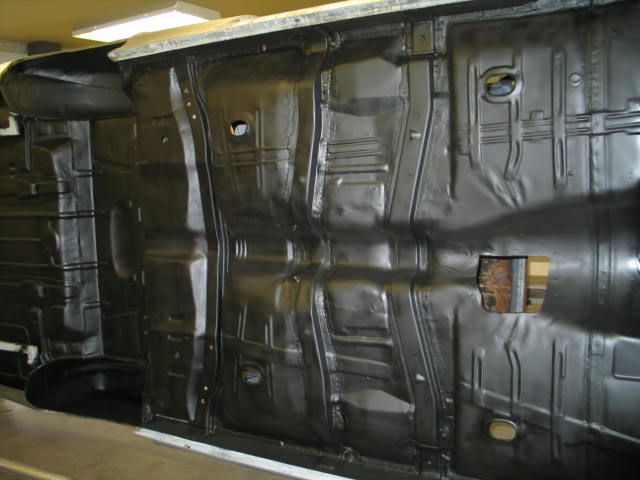
...then Lyle got out the POR15, a pail of seam sealer, and some semi gloss chassis paint to duplicate the stock underfloor paint
 ..and
we can finally say goodbye to almost 40 years of rust!
..and
we can finally say goodbye to almost 40 years of rust!
 The firewall was also POR15'd, seam sealed, then semi-glossed for the correct
look.
The firewall was also POR15'd, seam sealed, then semi-glossed for the correct
look.
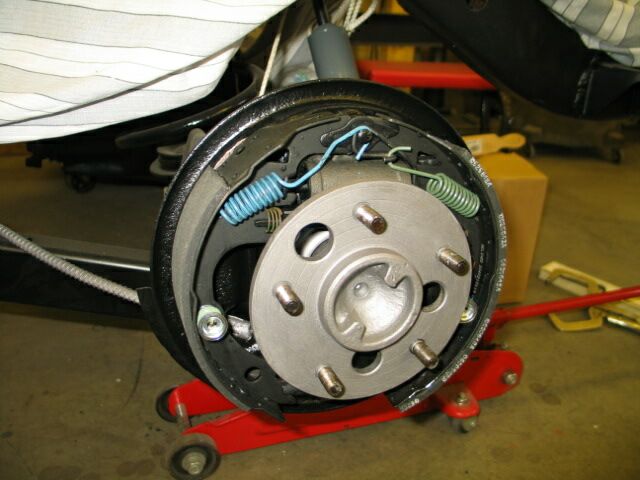
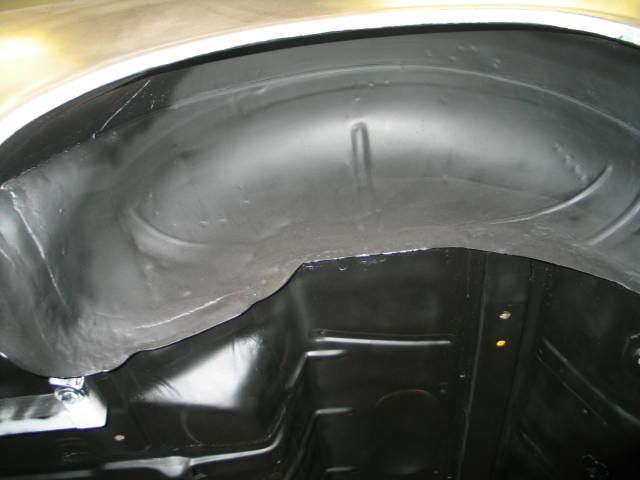 Here's the rear wheelhousing. Look carefully, since this is what it looks
like before I cake it full of tire rubber....
Here's the rear wheelhousing. Look carefully, since this is what it looks
like before I cake it full of tire rubber....
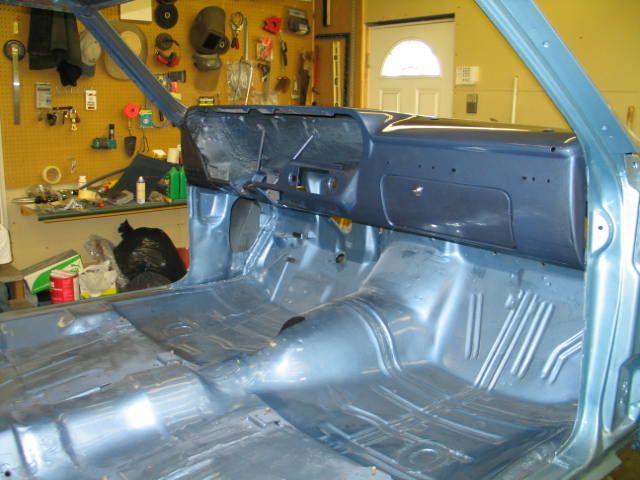
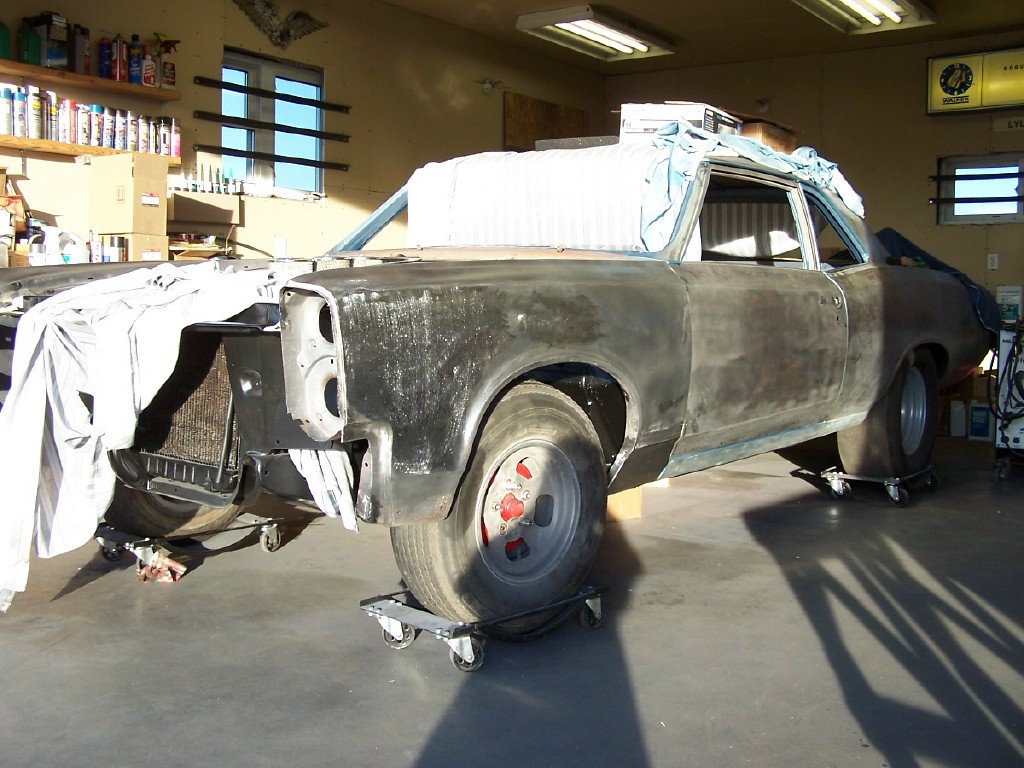
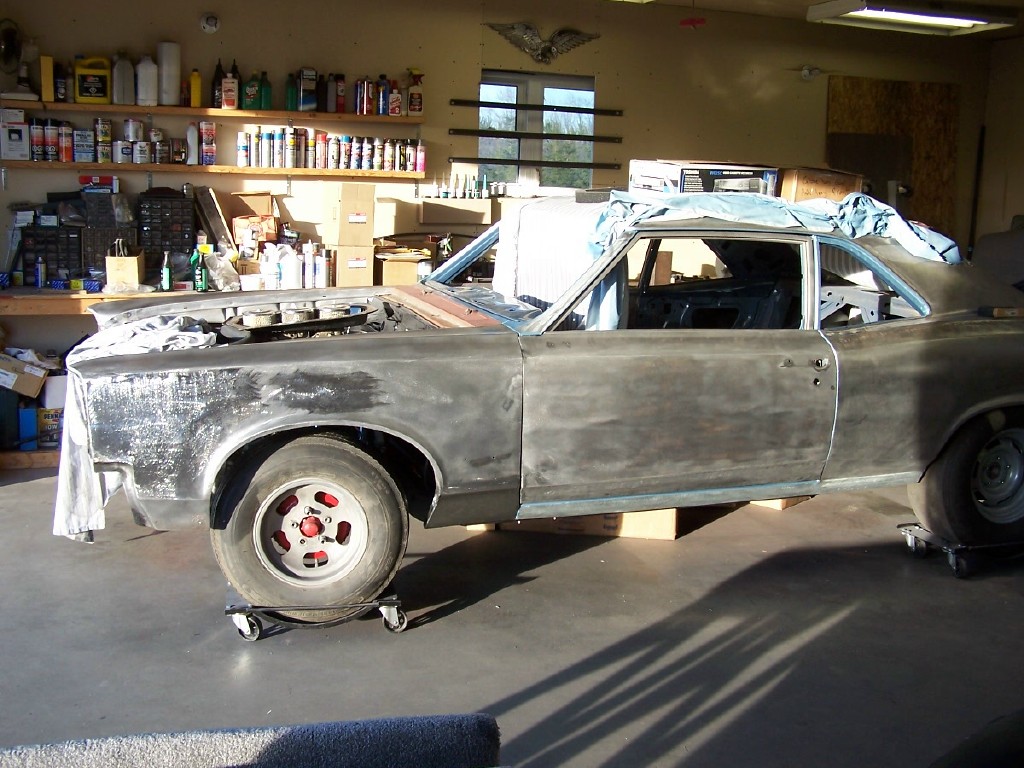
 Then the top side of the body got nekkid! At the same time, the dash and
interior painted surfaces were stripped. It's starting to get exciting
again. We're hoping to get the body on the new frame in the next few weeks.
Then the top side of the body got nekkid! At the same time, the dash and
interior painted surfaces were stripped. It's starting to get exciting
again. We're hoping to get the body on the new frame in the next few weeks.
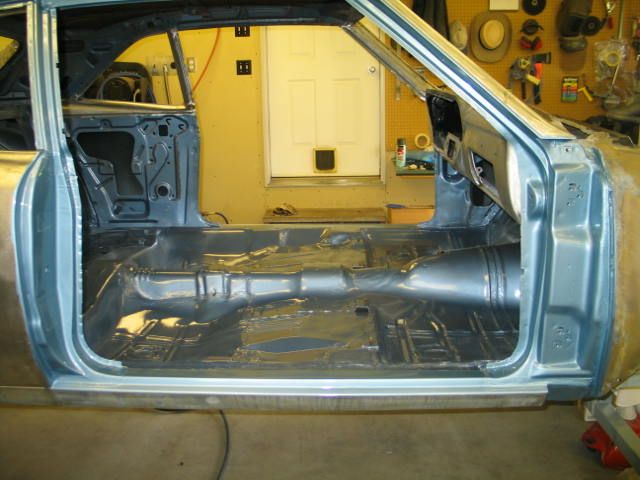
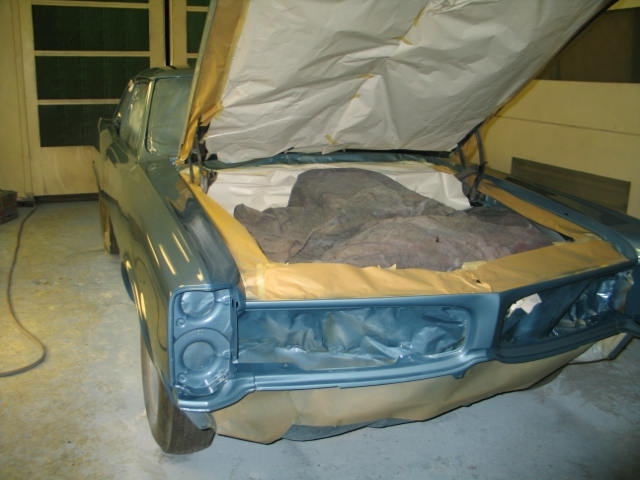
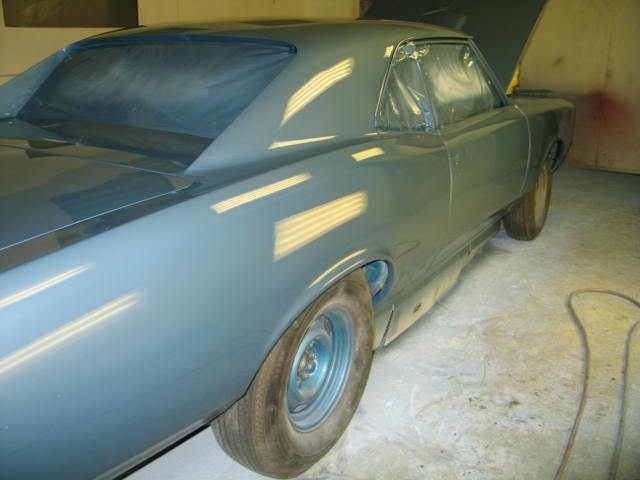
Door (and trunk) jambs are painted (the correct Fontaine Blue)!
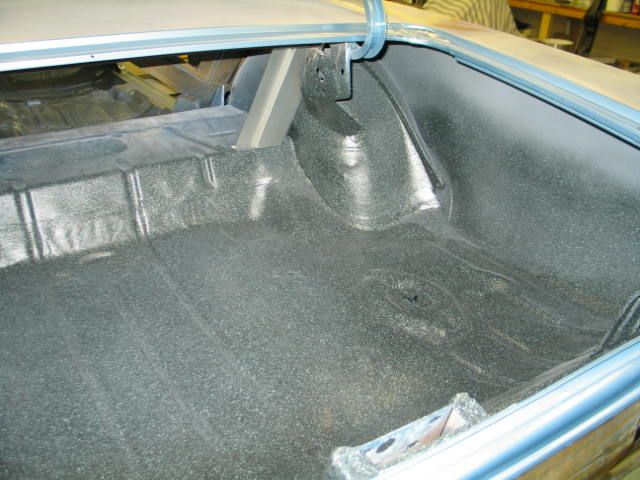
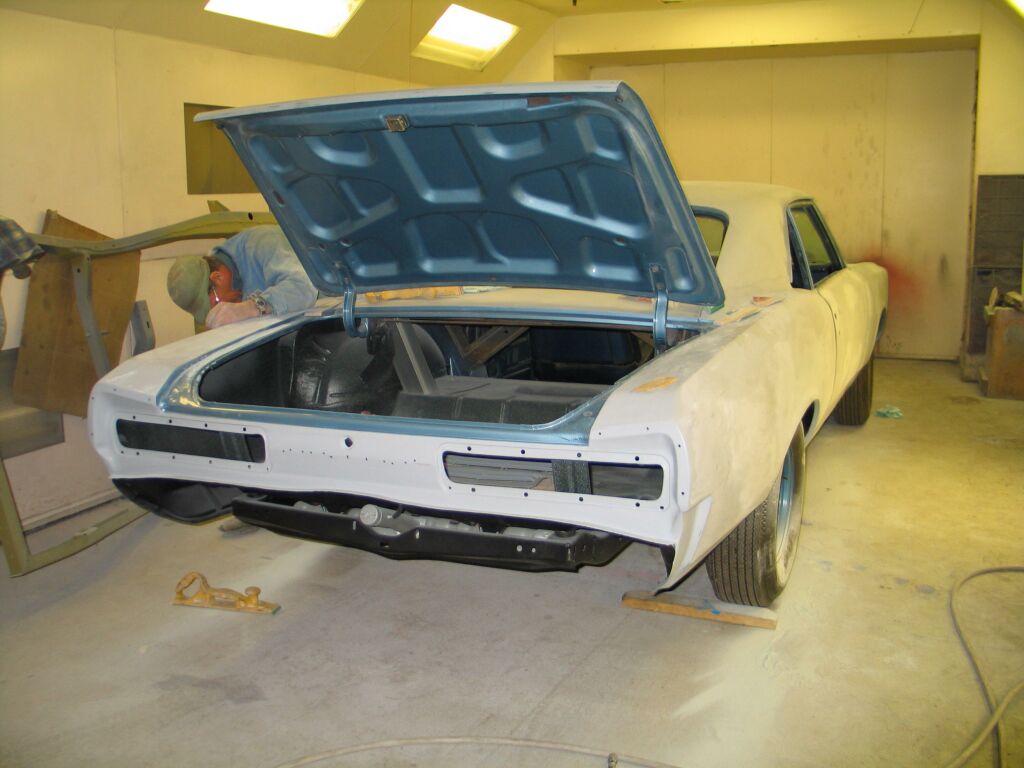
Got the trunk done! Seams sealed, POR15'd, and spatter painted (picture does not do it justice - it truly looks awesome).
Assembled the new billet steel flywheel, B&B/Long-style clutch, and Lakewood scattershield....
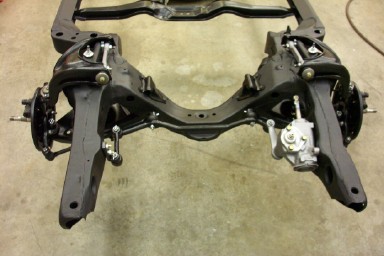
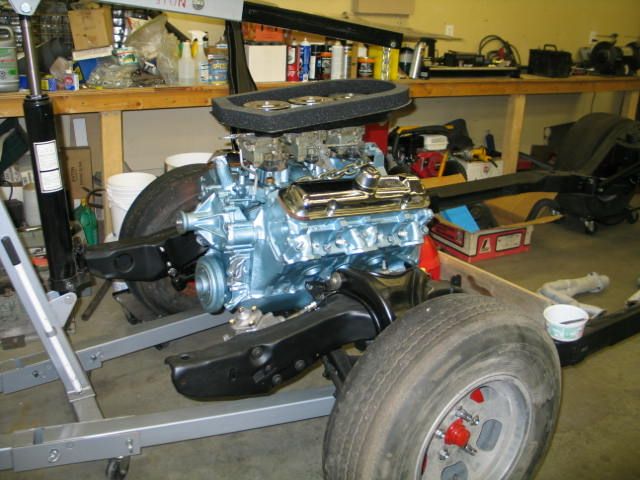
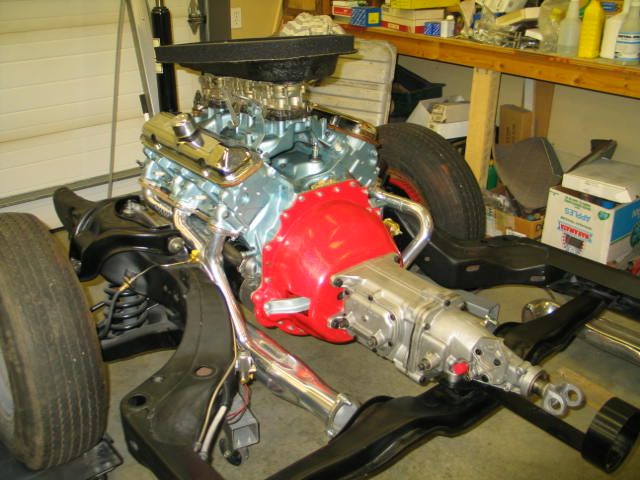
..then dropped the engine in the frame!
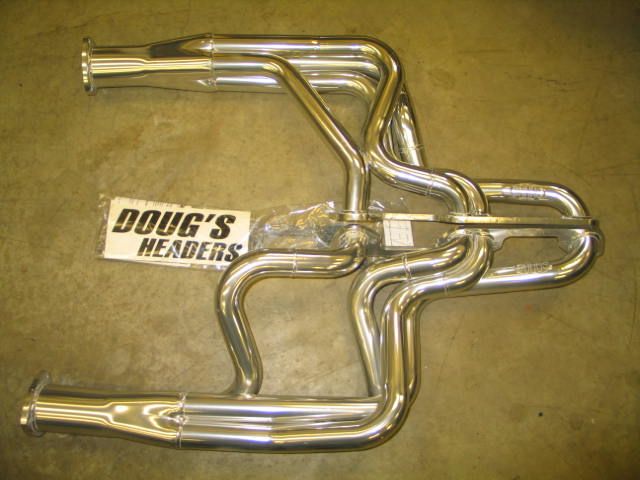
Found the headers didn't fit! Ordered new (expensive) ceramic coated
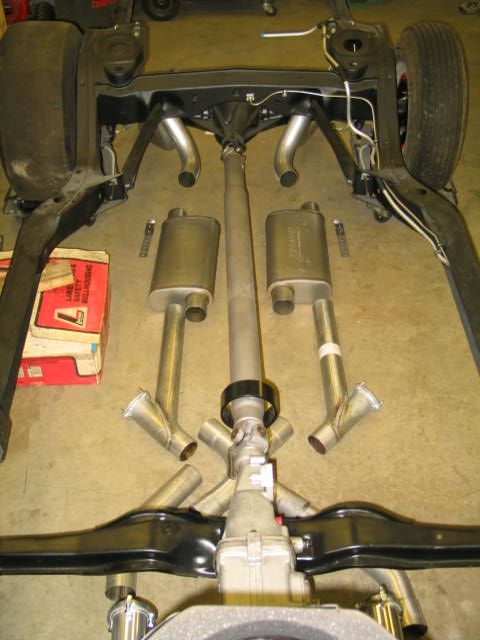
Doug's Headers (along with the 3" X-Pipe exhaust system).
Got the new (and expensive) Doug's headers. Man, you get what you pay for! Not only were the headers gorgeous, they also fit perfectly! We also got the rest of the drivetrain installed.
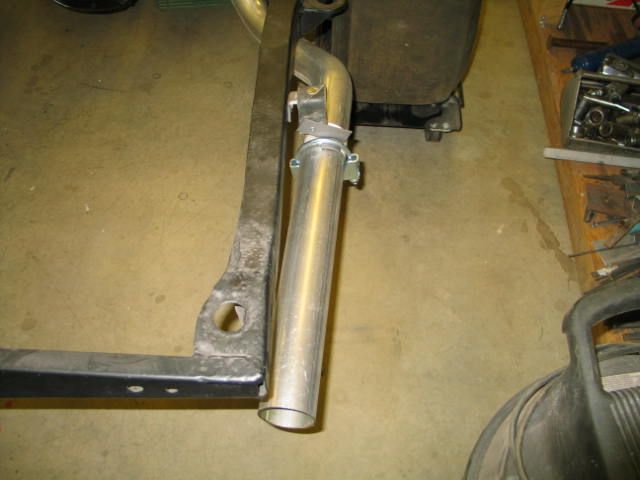
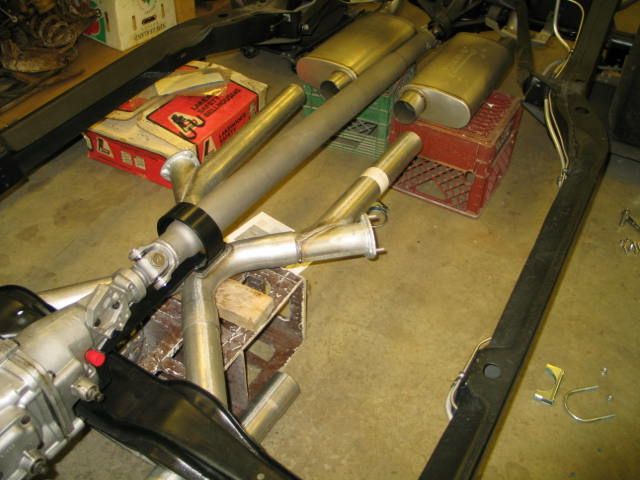
Also got the full 3" X-pipe exhaust kit. The X-pipe fit up very well to the headers, but unfortunately, the mufflers and tail pipes were not a good fit, especially the RH pipe (shown) so after much fighting, we decided to leave that nightmare to a muffler shop to fix (and hang).
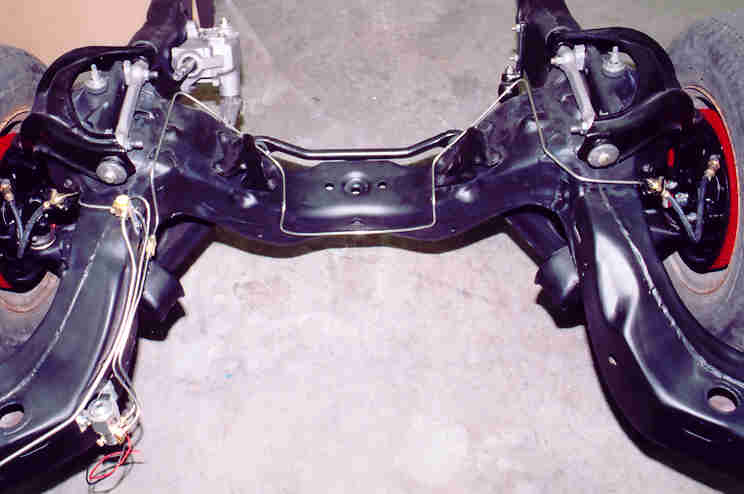
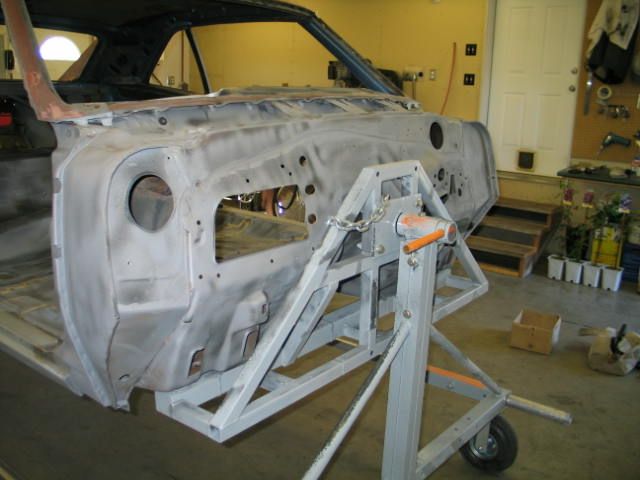
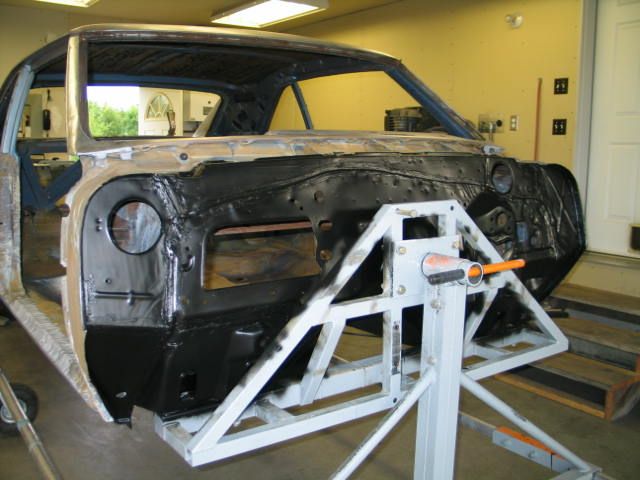
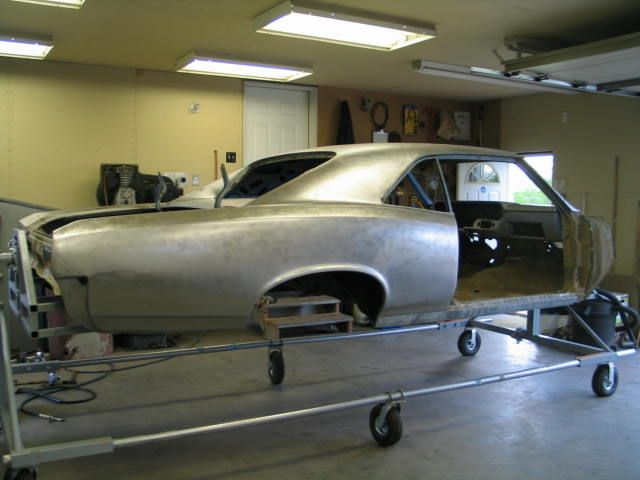
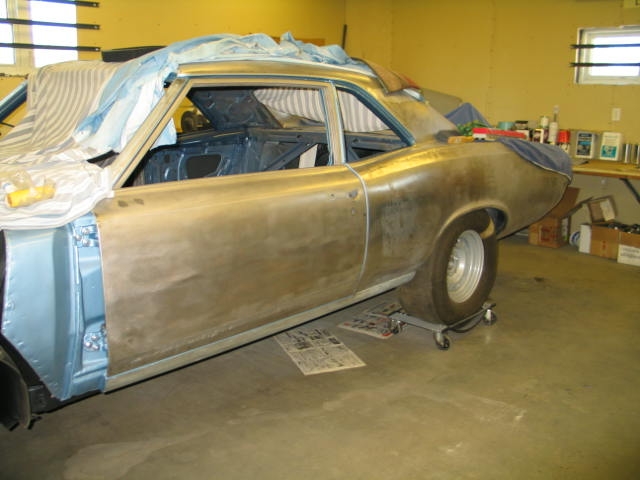
The body is back on the frame! We simply rolled the built up frame under the body, then dropped it down one end at a time, and bolted it up.

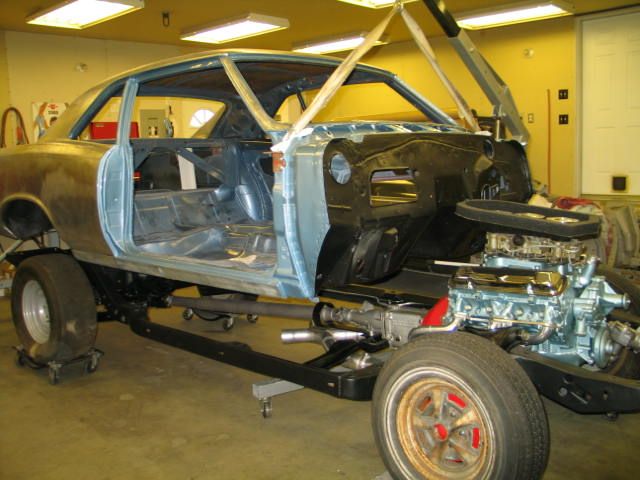
Now the buildup will commence!
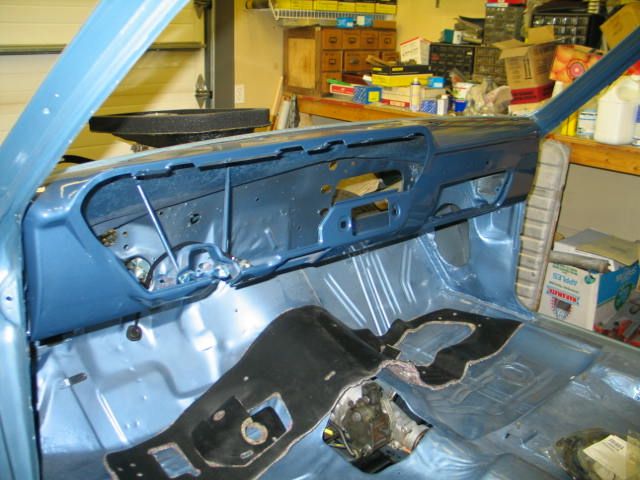
Turned out the third iteration of interior paint was almost perfect, but since it was painted over the (too dark) second iteration, it still came out a bit dark. Oh well. Here's the dash, just before installing the new firewall insulation.
Lyle has been attacking the doors. The driver's side has all the metal work completed. The passenger side is a bit uglier. Pictures soon.
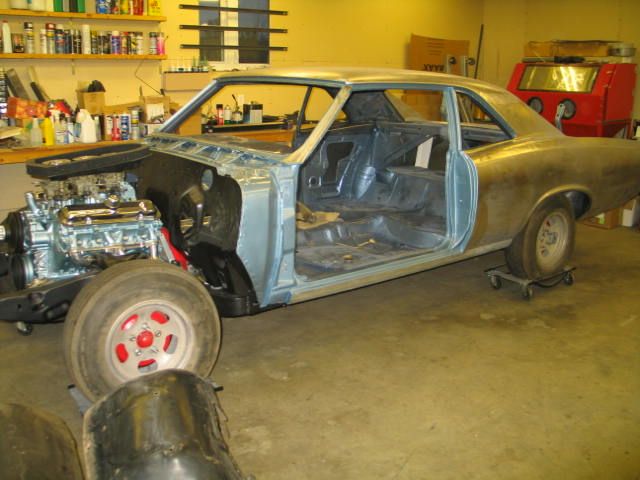
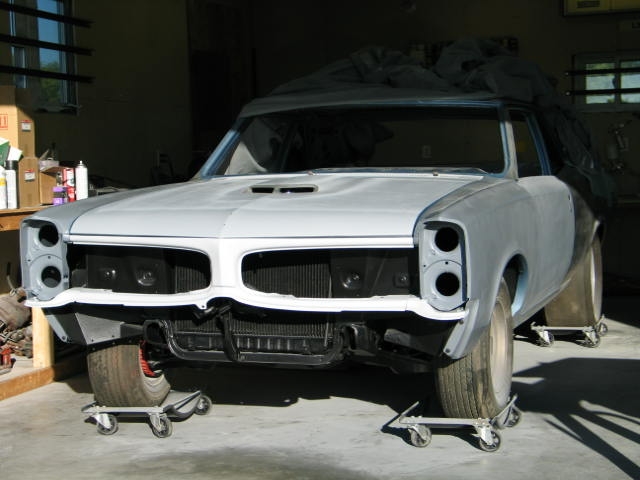
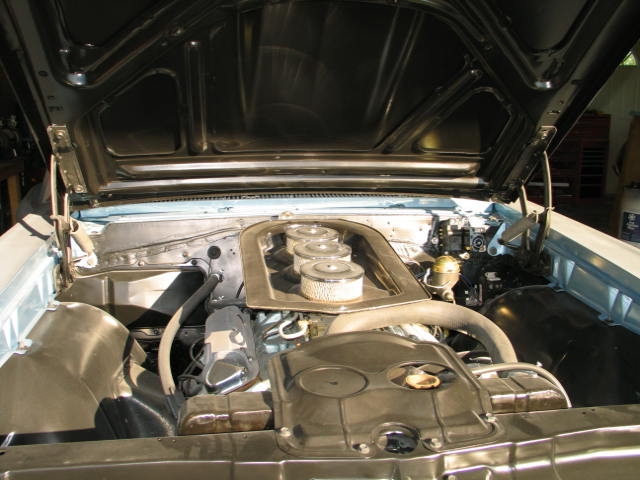
I've been slowly building up the front end of the car. Engine compartment below (yes I know I have a power steering upper radiator hose by mistake, it'll get fixed later)...
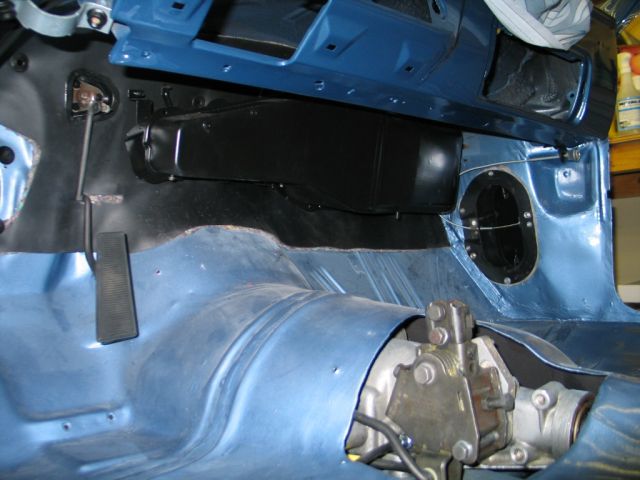
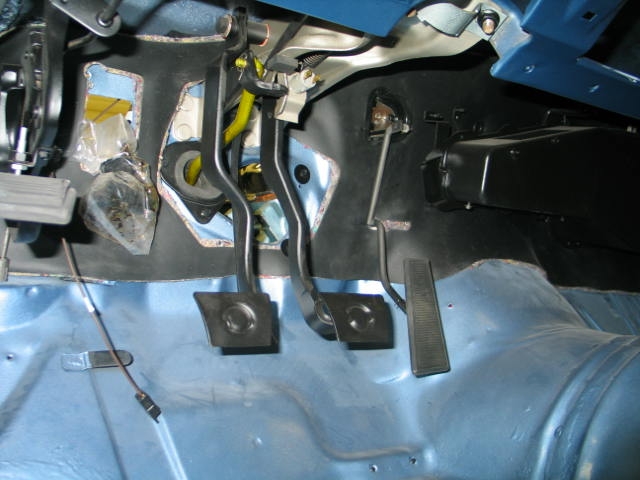
Inside the car the firewall is taking shape. Heater and pedals are in place...
The buildup continues. We're hoping to fire the engine in the next month!
Maybe it doesn't look like much to you, but those doors were a mess. Lyle performed some sheet metal magic again. Both doors were rotted along the bottoms, forcing both bottoms to be cut out, and new metal formed/shaped to replace the rot (Lyle actually made templates to do this - a future in NASCAR bodywork maybe??). Here's the driver's side door in process...
And this is the mess we found under a ton of body filler along the back edge of the passenger side door...
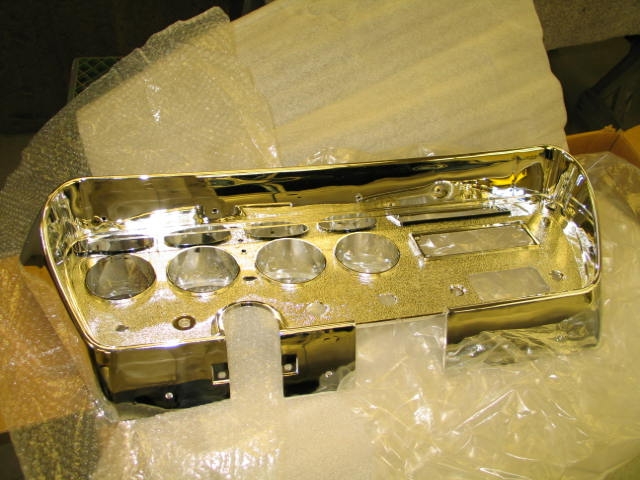
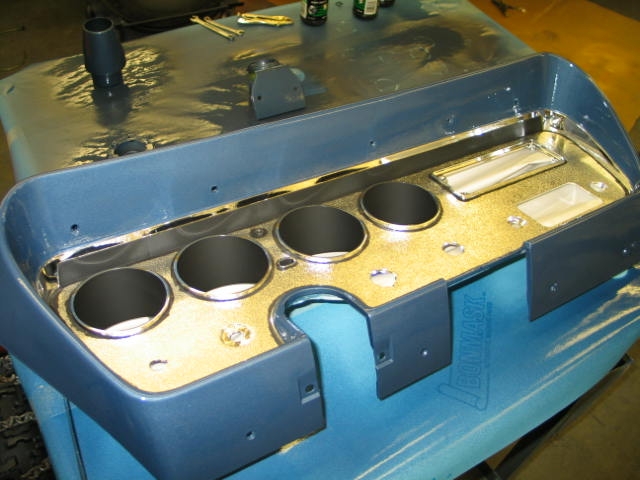
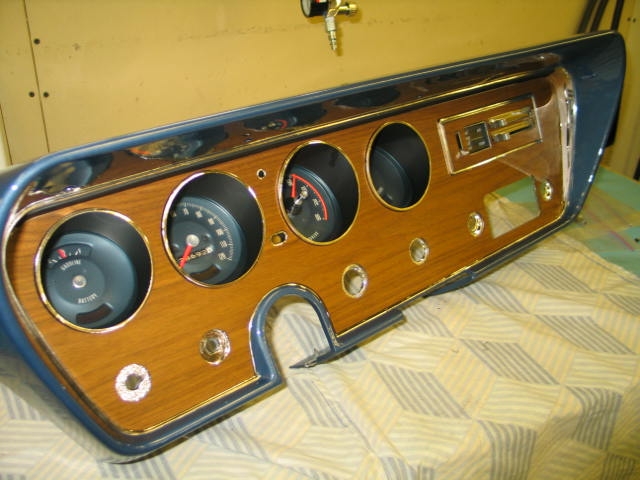
The other big news is the dash bezel is back from rechroming (vacuum metallizing, actually). It's really going to be a shame to paint over most of it.
Next up, the old fenders are off to the sandblaster....

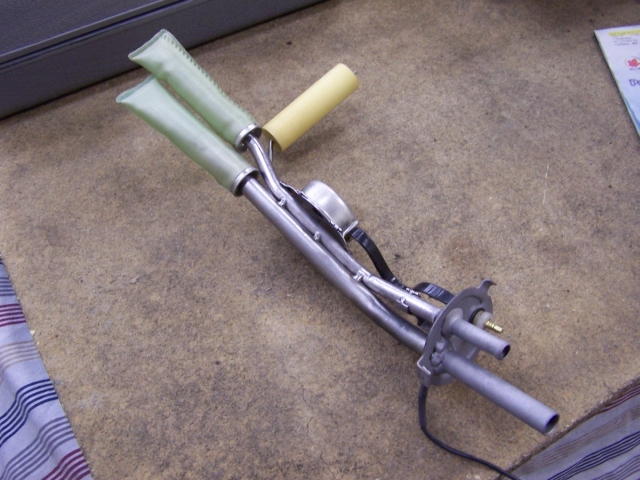
In the mean time, Lyle has been busy with the fuel system. To feed enough fuel to our future nitroused killer, a custom fuel inlet was fabbed up. In addition to the 3/8" inlet on our new sending unit assembly (factory original one was only 5/16"), Lyle added an additional 1/2" fuel pickup on the sender assembly. Stealth is key.
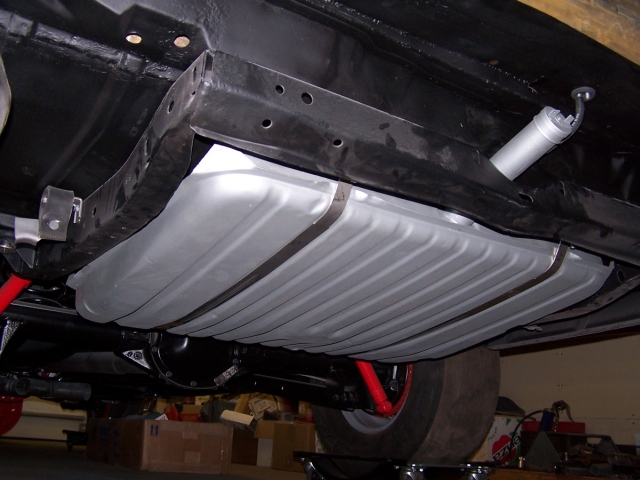
With the new pickup back in the restored tank, Lyle heaved the tank back into the car, with all new stainless steel straps and hardware. The repro fuel tank isolator (a HEAVY rubber mat) was cut down to the minimum strips required to properly mount the tank, and saved a whole bunch of weight.
The remaining fuel system will be built up in the next couple weeks.
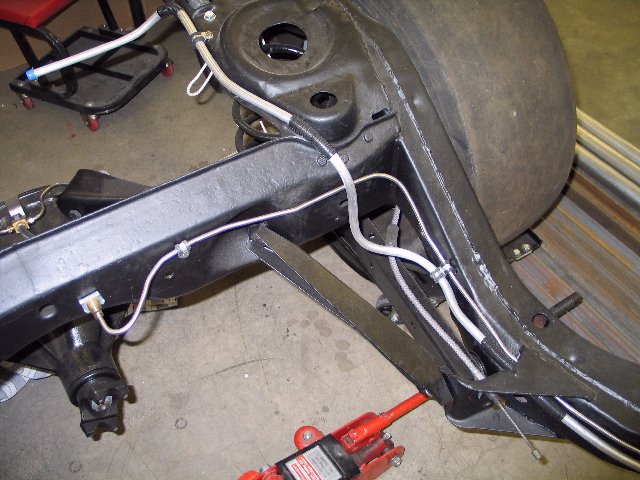
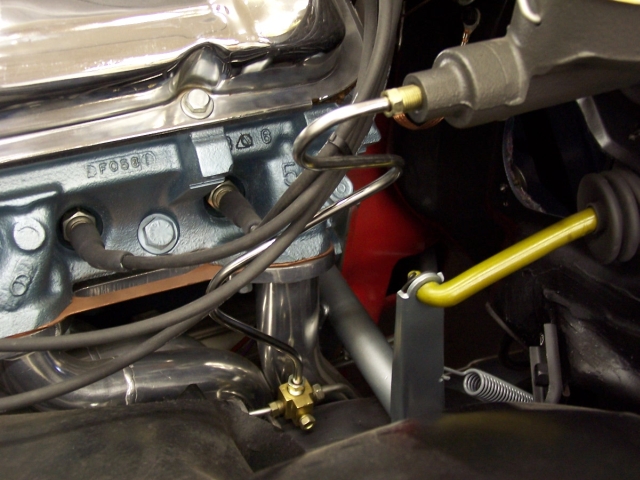
In preparation for a running engine, the last of the stainless brake lines (from the master cylinder) was bent up by Lyle and installed. We should have the brake system filled, bled and functional in the next week or so. Again, stealth is the key, so our linelock is mounted of out site. Only the keenest eye will catch the plug in the distribution block...
Soon, we'll make some wonderful glorious noise.
And we're still hoping to fire the engine as soon as the fuel system
is together...
Anyhow, Lyle's been busy on the fenders, and the old goat (the GTO that is, not Lyle) is starting to look like a car again. We may have paint on this thing sooner than we thought.
 Warning,
these images are bigger than the usual 640x480 size I use elsewhere.
Warning,
these images are bigger than the usual 640x480 size I use elsewhere.
Oh yeah, besides the miracles Lyle was working on the fenders, he also found time to mask and paint the rechromed dash bezel.
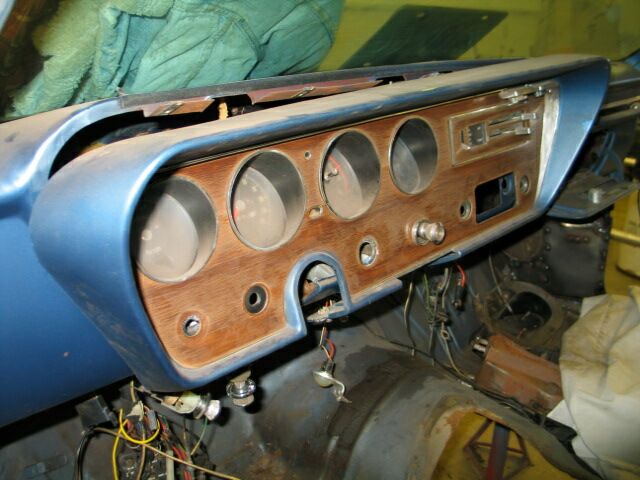
I found some time to clean and restore all the dash parts, gauge cluster, etc. Taking some plastic polish to the gauge lens made a world of difference.
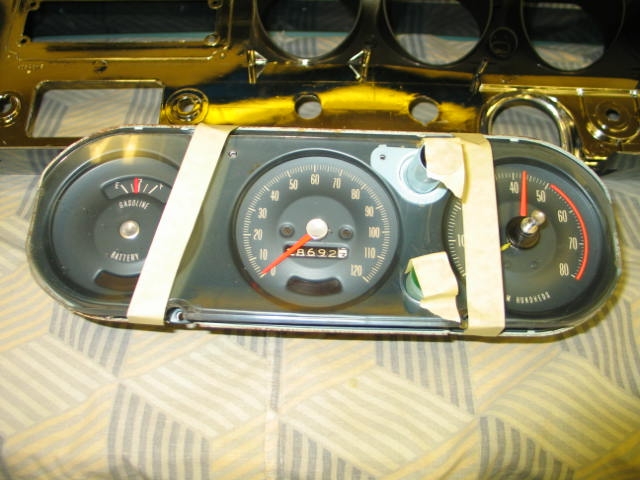
In the end, the dash turned out incredible. Pictures do not do it justice, you really need to see it in person.
My apologies for some of the pictures on this update. Half in the sun, and half in the shadows is challenging for taking good pictures.
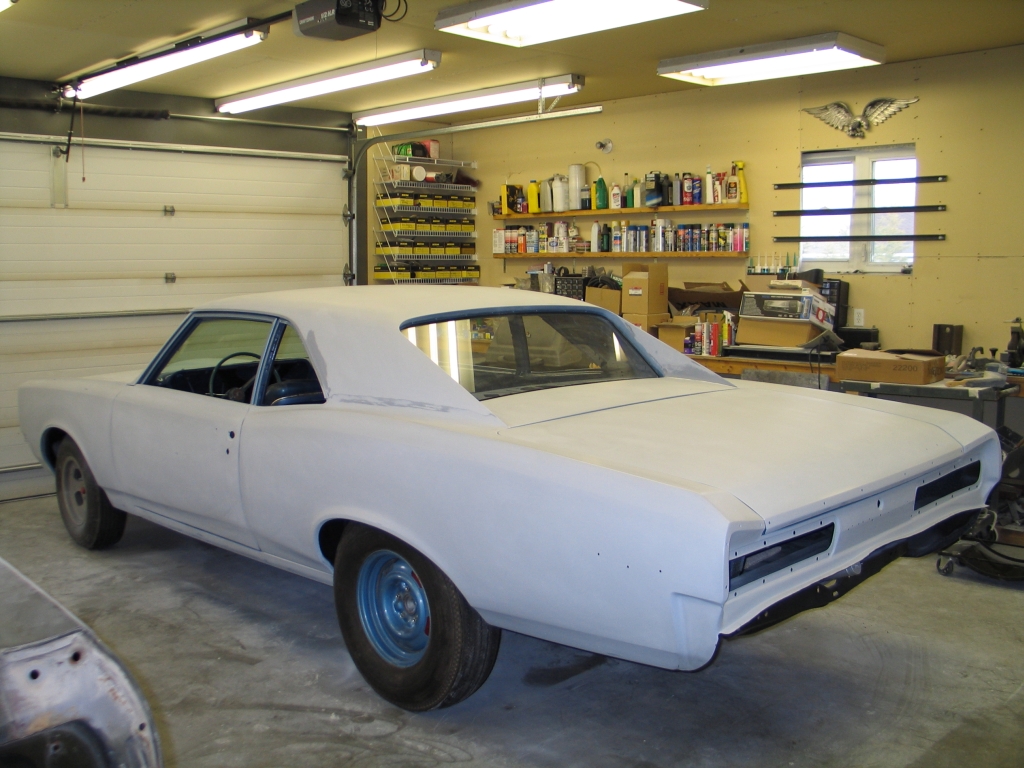
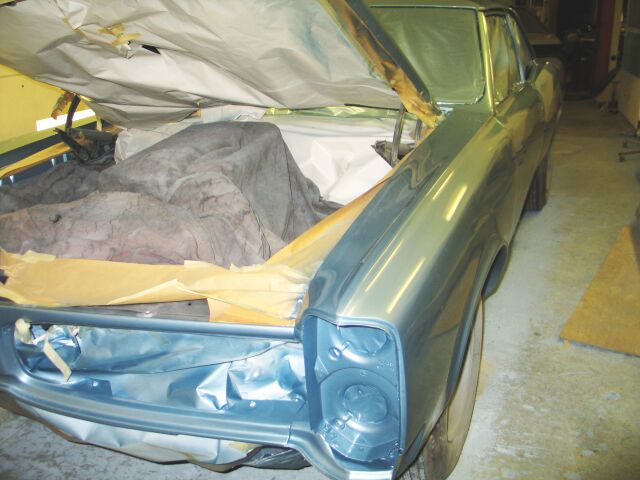
Front view showing how complete the car is now:
Engine compartment (with tons of dust on everything):
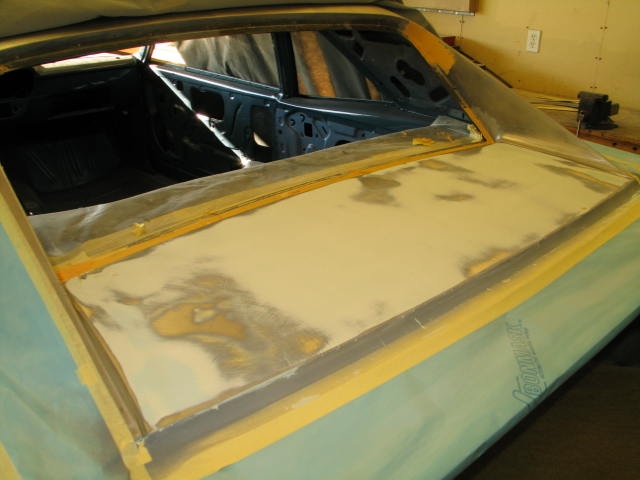
Trunk lid, where Lyle has identified some areas to still fix (rust at rear lip has been fixed already):
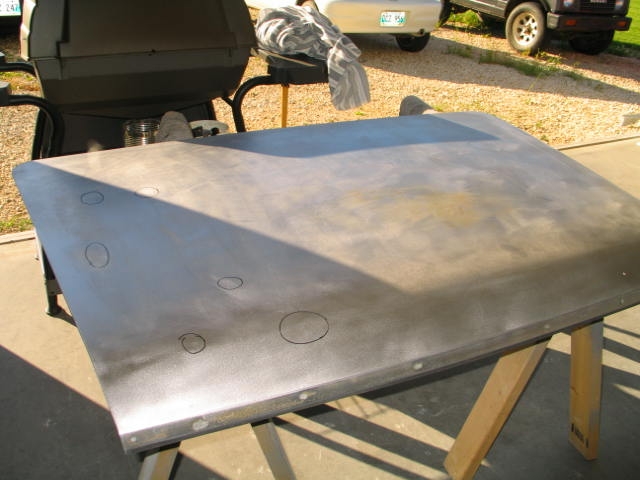
Rear filler panel between back window and trunk (this is the current work):
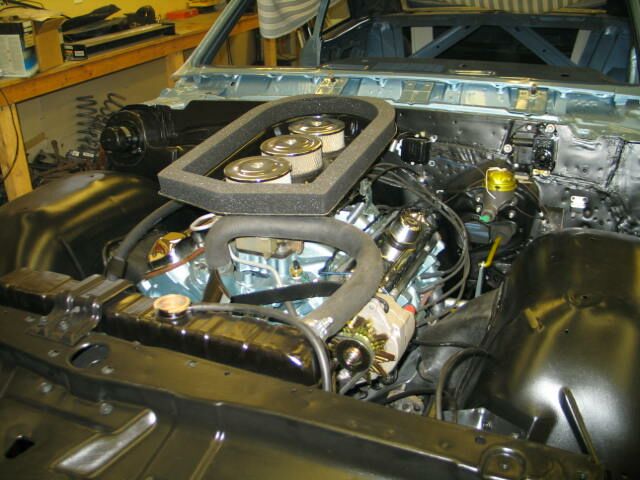
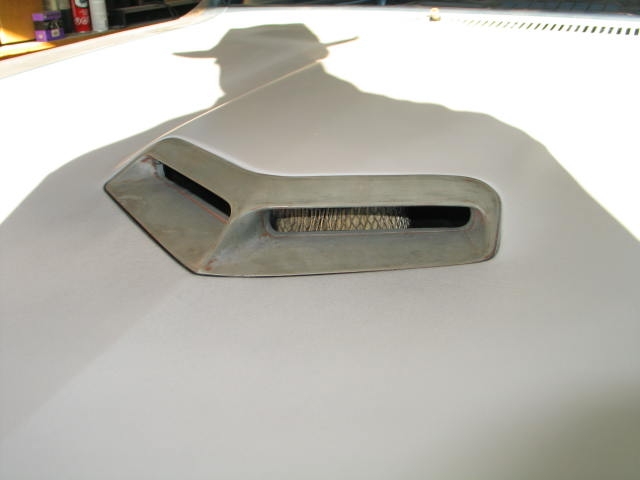
And finally, my favourite picture, the opened up (Ram Air I) hood scoop, where you can actually see the tripower aircleaners inside (very cool shadow in the picture too):
That's it for now. Next update will hopefully show a completely painted
GTO...
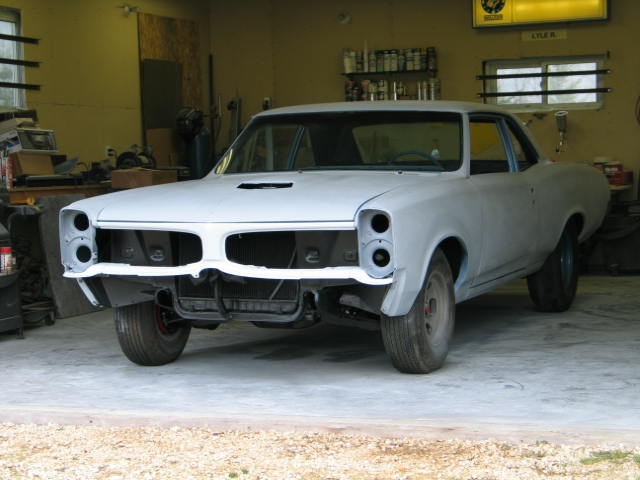
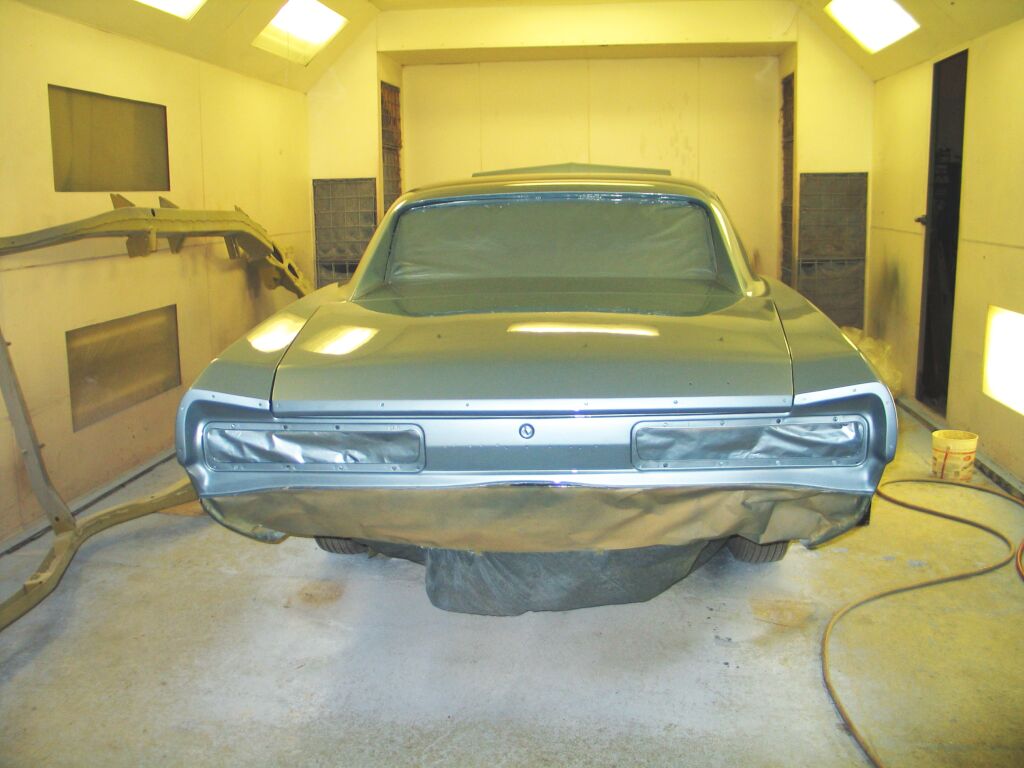
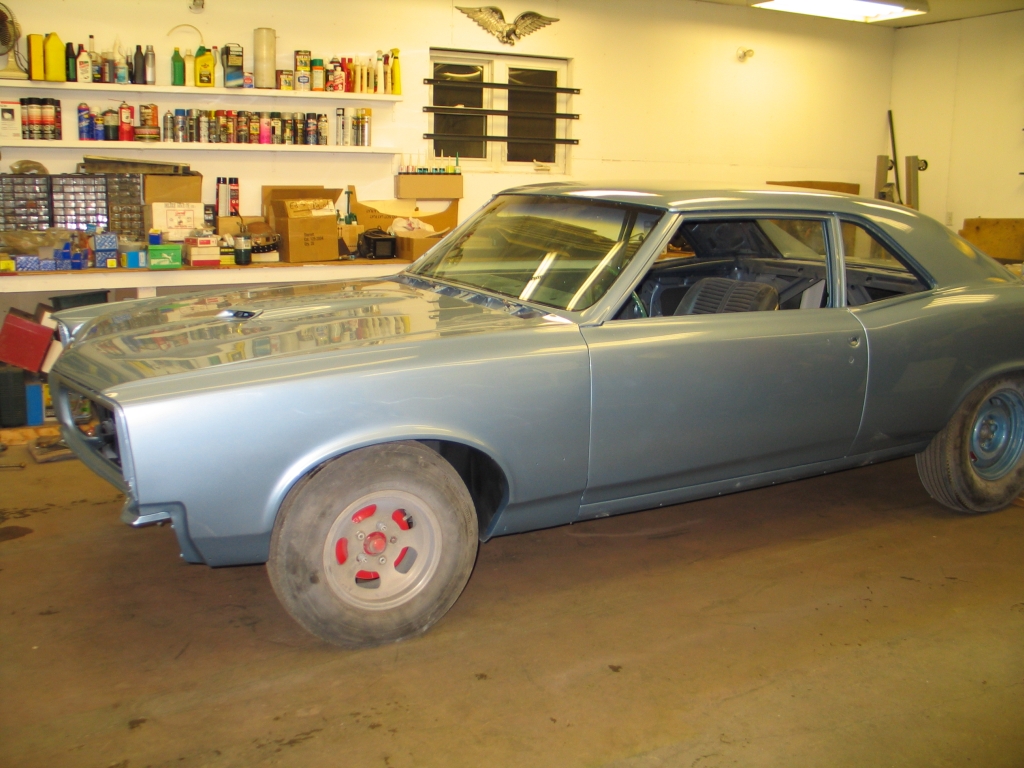
As I type this the car is in the paint shop. Here's what it looked like on the way there today:
The next update (in about 2 weeks) will have paint on the car.
Then it may be several months before the next update. The GTO will be
put in storage for a few months after paint before more work resumes. I
need to recover financially for a while from this, plus other projects
(like my other 11 second black car).
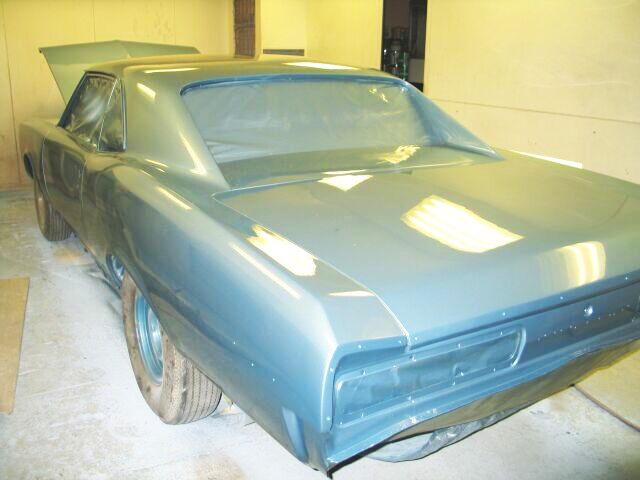
It was finally painted just before Christmas, but much to my horror, the Dupont base-clear formulation turned out WAY too dark, and in my opinion, not even close to the correct "Fontaine Blue" lacquer.
So then began weeks of "discussions" about what would be done to correct the problem, and who would be paying for what. I learned an important lesson, and for anyone else reading this who is in the middle of a classic restoration, or thinking about starting one: paint suppliers do not guarantee colour matching. The modern base clear paints use completely different pigments than the old lacquers and enamels, so you roll the dice on whether the colours will match. I never thought anything of it before hand, since Lyle already painted the door jambs, and many other parts and areas of the car using both Sikkens base clear paint, and PPG enamels, and both of those matched the original lacquer perfectly. So naive me just assumed all paint would be the correct colour, given the factory colour codes.
Anyway, after several more weeks of trying small samples of various manufacturers base clear formulations, we found another Dupont base clear line of paint that matched quite well. So several weeks later (after winter getaways and a couple weeks of the flu), the GTO is finally painted, correctly.
So as soon as the paint is buffed out (actually happening as I type this), and the weather co-operates (I don't have an enclosed trailer, and it's currently snowing), the car will go back to the shop for Lyle and myself to put the interior back in, run all the new wiring harnesses, and replace all the exterior chrome.
Don't ask me when that will get done.....
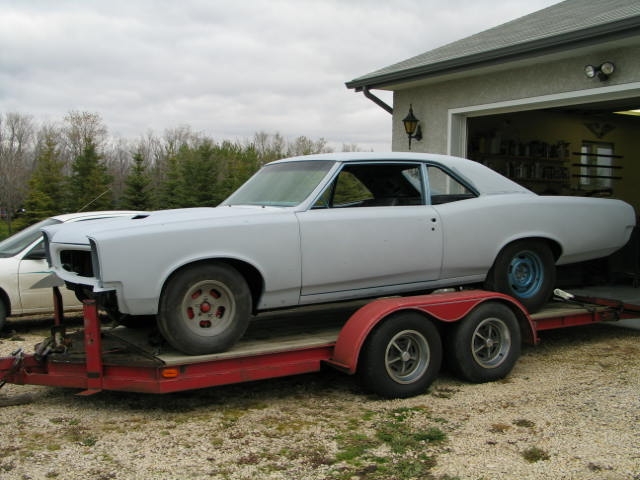
We picked up the car in the late afternoon, and got it up on the trailer and tied down while the sun was out (so we could see what we were doing, and not freeze to death in the process).

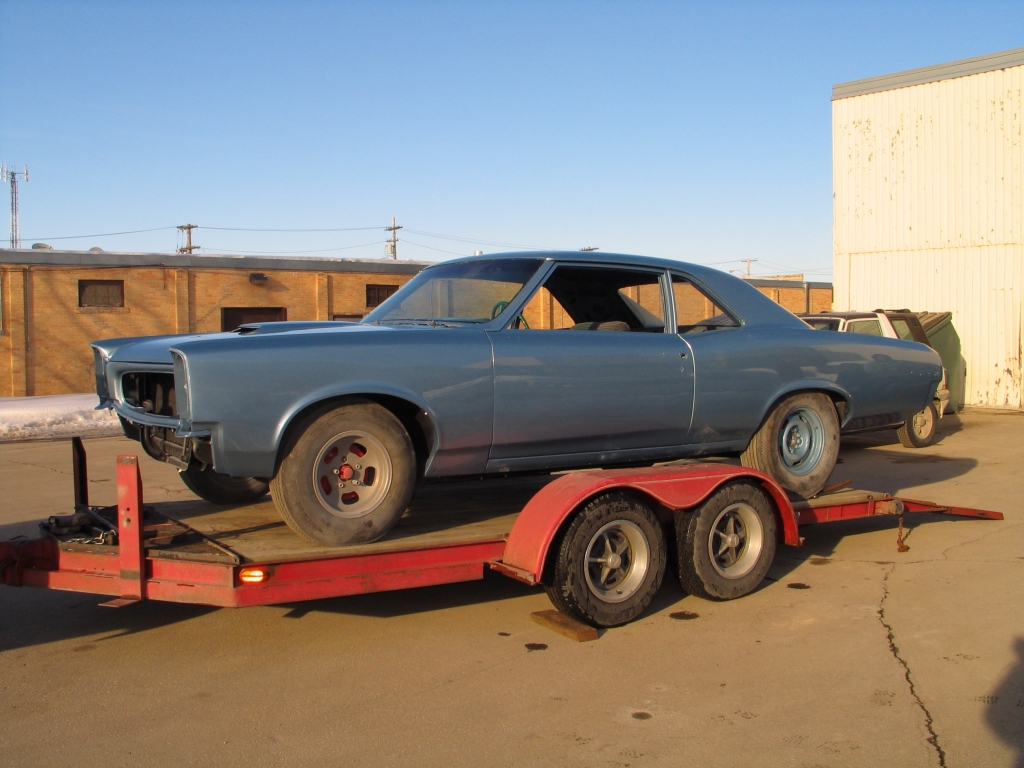
After loading it up, myself and the woman had a lengthy, leisurely dinner at the "House of Schnitzel" down the street, waiting for the dark and cold, and clean, dry streets. At that point we were on the road back to Lyle's, where the car now again resides, for the completion of the project.
It's taken a lot to get this far, but it looks great in paint. The plan
now is to give 'er to get it driving by the summer.
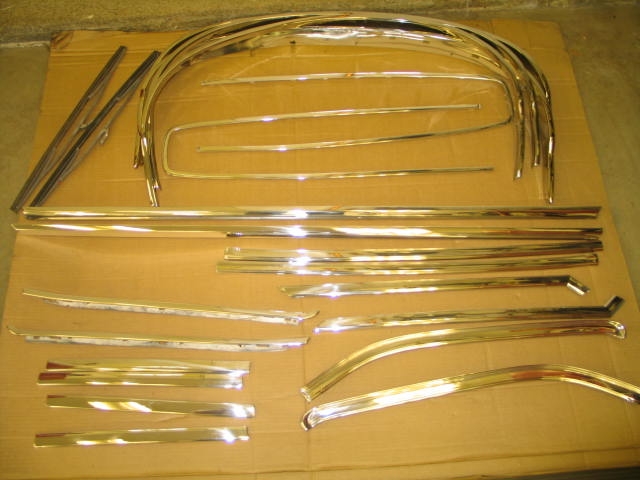
In the end, the results were amazing. Here's a small sampling..
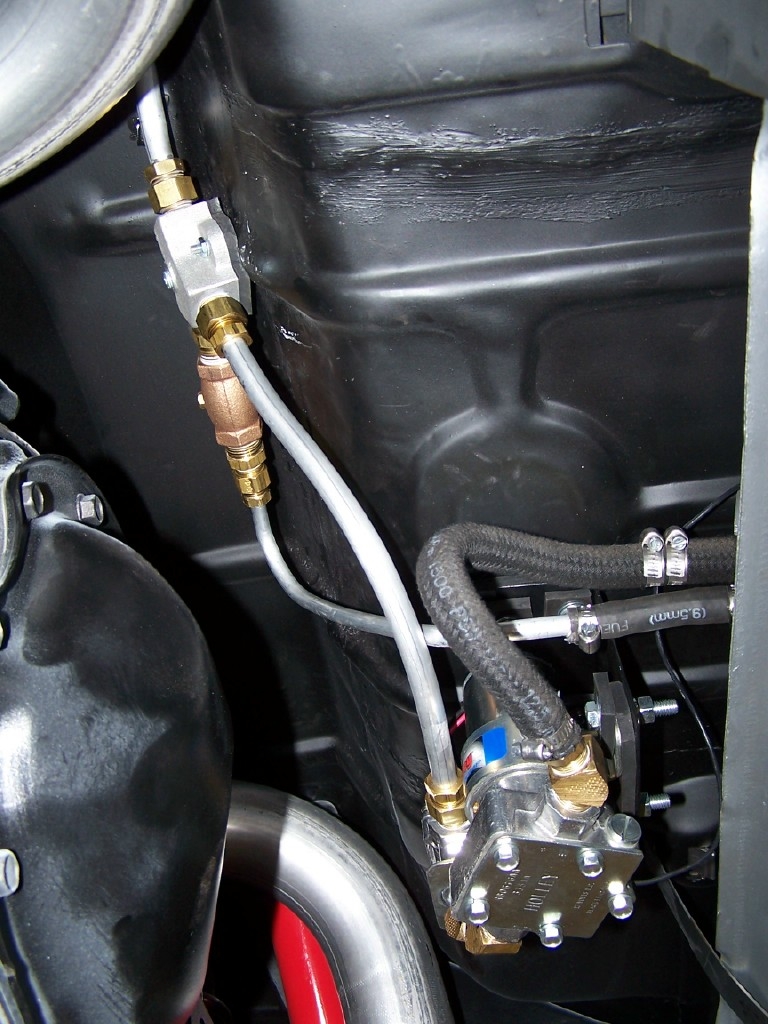
Other than the trim, the only work done on the car was completion of the fuel system. The system uses a high volume mechanical pump full time, then the Holley Blue as a boost pump, based on throttle position. This required some creative plumbing at the fuel tank, including a check valve to prevent the Holley from pumping fuel back into the stock 5/16" fuel pickup.
Next we hope to actually hang some trim on the car!
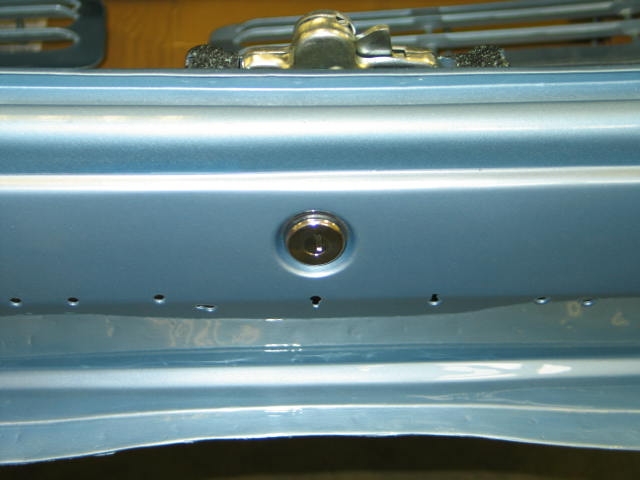
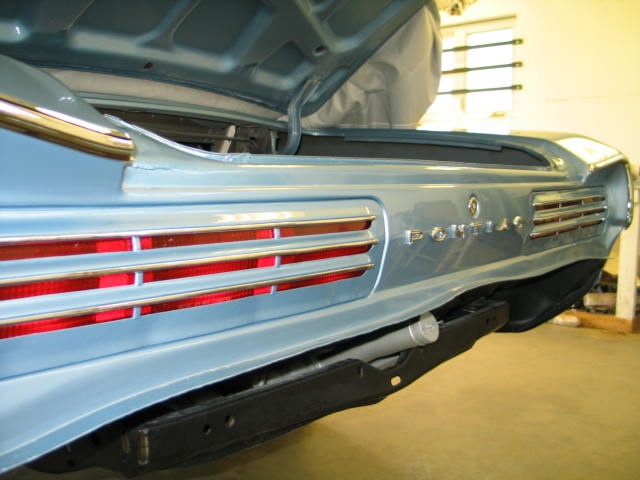
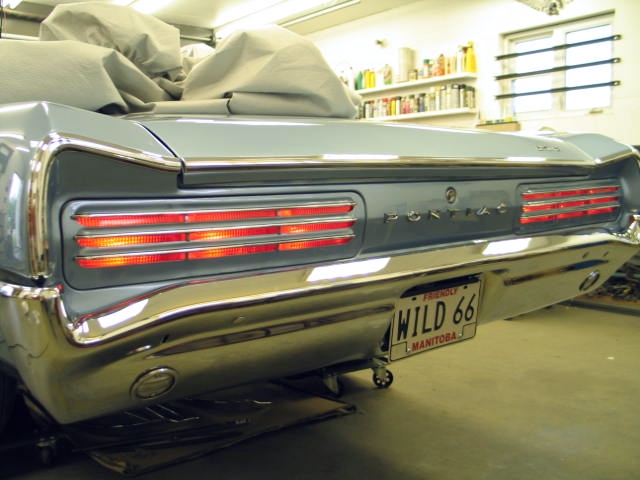
Then the restored tail lights went in, quickly followed by the rear end trim.
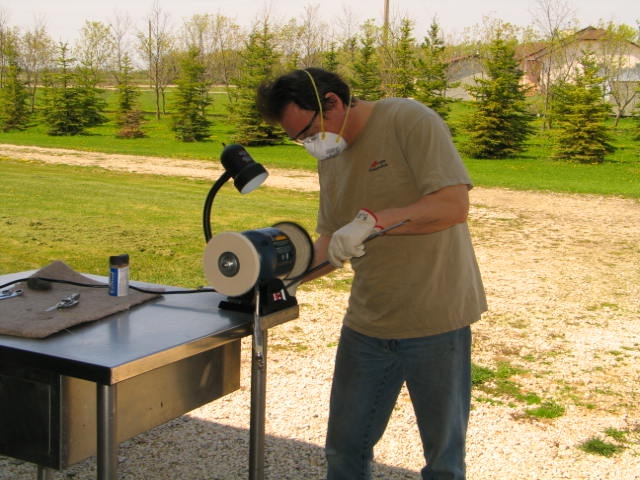
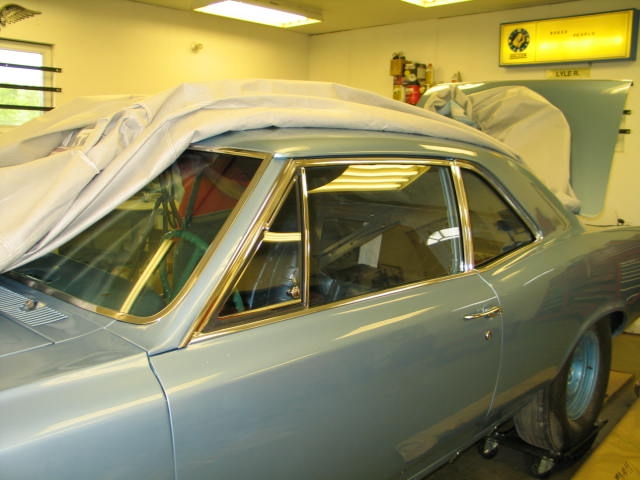
Lyle worked on the side glass mechanisms, weatherstripping, vent windows, and brightwork.
...while I continued working on the rear of car, by installing the bumper, and new harnesses. Here we're checking the tail light electrical.
NEXT: Current Status
email me if you want